A toilet flange creates the firm connection between the toilet, drainpipe, and finished bathroom floor. When installed correctly, it keeps the toilet stable and helps prevent sewer gases and wastewater from escaping. This small fitting deserves careful attention, especially during a bathroom renovation or replacement.
Many homeowners ask, “how is toilet flange attached to pipe?” The answer depends on the pipe material, flange design, and floor condition. A PVC flange may be solvent-welded to a plastic drainpipe, while a cast-iron connection may require a mechanical seal or specialized replacement fitting. The flange must sit level, remain fully supported, and align with the toilet’s mounting bolts. Even a slight tilt can cause rocking, wax-ring failure, or repeated leaks.
This guide explains the tools, measurements, attachment methods, and inspection steps used by experienced plumbers. You will see why removing the old wax ring completely matters, how to check the pipe’s inner diameter, and where subfloor damage can change the repair. A clean cut, dry fitting, and careful measurement usually prevent expensive mistakes. Still, not every installation goes perfectly. An uneven floor or hidden corrosion may require a different solution than expected.
Use products approved for your pipe type, and follow local plumbing requirements. If the drainpipe is cracked, the subfloor feels soft, or the connection remains uncertain, consult a licensed professional. A finished-looking flange is not necessarily a reliable one. The real test comes when the toilet stays solid, dry, and odor-free after repeated use.
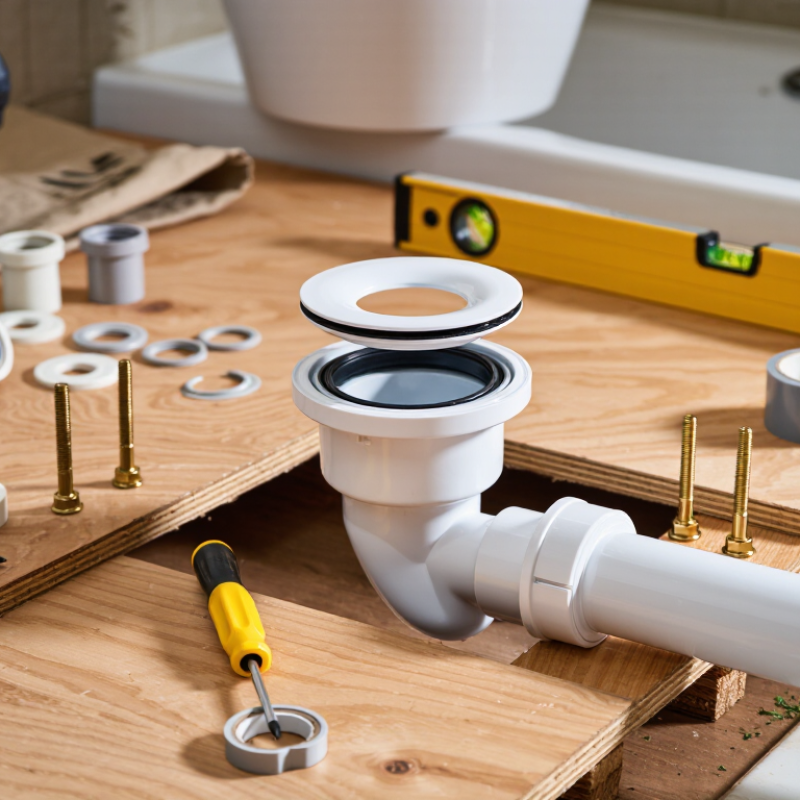
A toilet flange is the fitting that connects the toilet base to the drainpipe and supports the toilet securely. It also provides bolt slots for fastening and a sealing surface beneath the toilet. The flange must sit level with, or slightly above, the finished floor. If it sits too low, the seal may compress unevenly and allow leaks or odors. Too high, and the toilet can rock.
Pipe connections require careful measurement before installation. Check the drainpipe material, outside diameter, and available insertion depth. Cut the pipe squarely, then remove burrs that could damage the internal seal. A solvent-welded connection needs clean, dry surfaces and the correct joining method for that pipe type. Some repairs use mechanical fittings instead. Follow local plumbing requirements, since acceptable methods vary by location.
I have found that alignment matters more than force. Dry-fit the flange first, and place it so the bolt slots match the toilet base. Secure it to solid flooring with corrosion-resistant fasteners. The drainpipe should remain stable while the flange is attached. Do not depend on the toilet to hold a loose flange in position. Small mistakes hide easily.
A level helps.
After installation, test the connection before sealing gaps around the base. Fill the bowl, flush several times, and inspect the pipe joint and floor beneath it. A slight movement often signals poor support, uneven flooring, or a damaged seal. I once treated rocking as a minor issue; it became a leak later. That lesson still influences every flange inspection.
It connects the toilet base to the drainpipe. It also supports the toilet and holds the fastening bolts. Its upper surface helps create a watertight seal.
The flange should sit level with, or slightly above, the finished floor. It should not rest only against the subfloor. A low flange may compress the seal unevenly. A high flange can make the toilet rock.
Center it over the drain opening. Measure from the finished wall. Check that the bolt slots match the toilet base. Dry-fit it before drilling.
Check the pipe material, outside diameter, and insertion depth. Inspect for cracks, moisture, and uneven cuts. The pipe must remain stable. Remove debris from its inside edge.
Cut the pipe squarely. Remove burrs from the cut edge. Clean and dry the joining surfaces. Use a connection method suitable for that pipe type.
Mark every screw location through the flange. Fasten it into solid flooring or framing. Use corrosion-resistant fasteners. Tighten screws evenly, but do not overtighten them.
Place a small spirit level in two directions. The flange should not rock or show gaps. Dry-fit the toilet and check its stability. Small mistakes can hide easily.
Test it before sealing gaps around the toilet base. Fill the bowl and flush several times. Inspect the pipe joint and the floor below. Look for moisture or movement.
It may indicate poor support, uneven flooring, or a damaged seal. A loose flange can stress the drain joint. I once ignored rocking. It later became a leak.
Rushing the final inspection is a common weakness. The flange may look centered but sit slightly high. Recheck the level, bolt alignment, and floor support. Almost level may not be enough.
Attaching a toilet flange to a pipe requires careful preparation, accurate positioning, and a reliable seal. First, understand that the flange connects the toilet outlet to the drainpipe while also providing the mounting points for the toilet. Gather essential tools, clean and inspect the drainpipe, and confirm that it is properly cut, level, and free of debris. The key question, “how is toilet flange attached to pipe,” depends on the pipe material and flange type, but the connection should always fit securely and align with the finished floor.
Position the flange so it sits at the correct height and the bolt slots are placed evenly on both sides. Secure it to the surrounding floor with suitable fasteners, then apply the appropriate sealing method around the pipe connection to help prevent leaks and odors. Install the mounting bolts, check that the flange remains level and stable, and inspect the entire connection before proceeding. Once everything is secure, the area is ready for the toilet and its sealing ring to be installed.

 EZ STEEL