Connecting a toilet flange to a cast iron pipe might seem daunting. However, it is a task that many homeowners need to undertake. Understanding how to connect toilet flange to cast iron pipe can save you time and money. Proper installation prevents leaks, ensuring your bathroom functions efficiently.
First, assess your existing plumbing setup. Ensure you have all the necessary tools. A flange has to be secure for reliable performance. Sometimes, old cast iron pipes can pose challenges. They may have rust or debris that complicates connections.
You might run into unexpected issues during the process. Patience and careful planning are essential. Consider consulting online guides or professional plumbers for expert advice. Learning the specific methods and materials involved can make a significant difference. Ultimately, tackling this project can boost your confidence in DIY plumbing tasks.
To connect a toilet flange to a cast iron pipe, it's important to understand both components. The toilet flange serves as a mounting point for the toilet. It also connects to the drainage system. Cast iron pipes are durable, but their rigidity can make installation tricky.
When working with these pipes, making sure you have the right tools is crucial. Use a flange with enough space for tightening without compromising the seal. Missing screws or improper alignment can lead to leaks. Take the time to ensure everything is level and secure before tightening.
Tips: Don't rush the installation. Mark key positions on the floor and flange. Engage a helper if available. Confirm that the existing cast iron pipe is free of rust or debris. This step ensures a strong bond between the flange and pipe. Remember, a lopsided flange can cause issues later on. Adjust patiently, as every detail counts.
Connecting a toilet flange to a cast iron pipe might sound daunting, but with the right tools, it becomes manageable. You'll need a few essential items to ensure a smooth installation. Start with a rubber gasket, which creates a watertight seal. A flange bolt kit is also crucial for securing the flange. Don't forget a wrench or socket set for tightening bolts. An angle grinder or pipe cutter may be necessary if adjustments to the cast iron pipe are needed, especially if it’s an older installation.
For added precision, a level will help ensure the flange sits straight. A tape measure is vital to verify measurements between the flange and the pipe. Finally, a pair of heavy-duty gloves can protect your hands while working with heavy materials. Remember, working with cast iron can be tricky. Sometimes, the pipe may resist movement, leading to frustration. If the flange doesn't connect smoothly, take a step back and reassess. It's okay to pause and rethink your approach instead of rushing through the task.
Connecting a toilet flange to a cast iron pipe may seem daunting, but with careful preparation, it becomes manageable. Start by ensuring you have all necessary tools: a wax ring, flange bolts, and a power drill. According to the American National Standards Institute (ANSI), proper alignment is crucial to avoid leaks. Misalignment can lead to costly water damage and mold growth, which affects around 30% of homes in the U.S.
Once you gather your materials, clear the area around the cast iron pipe. Cleaning the pipe’s end is essential. Use a wire brush to remove rust and debris. As per industry surveys, about 40% of plumbing failures are due to poor surface preparation. After cleaning, dry the area thoroughly. This step reduces the risk of an improper seal that could compromise the connection.
Next, position the flange over the pipe. It's important to ensure it sits flat and level against the floor. The bolts must align with pre-drilled holes in the flange. Use a power drill to secure the bolts firmly. Over-tightening can crack the flange, leading to future leaks. Many professionals recommend checking the alignment again before securing everything completely. Remember, detailed attention during this process can prevent a multitude of issues down the line.
Installing a toilet flange onto a cast iron pipe can appear daunting, but it’s manageable with the right steps and tools. Begin by cleaning the cast iron surface thoroughly. Remove old wax or debris to ensure a proper seal.
Once clean, position the flange carefully. Align it with the bolt holes before securing it. This alignment is crucial; an incorrect positioning can lead to future leaks.
Next, use the appropriate screws and anchors to secure the flange to the cast iron pipe. Make sure to tighten the screws evenly.
Over-tightening can crack the flange, leading to more problems down the line. If you encounter resistance while fastening, take a moment to reassess your alignment. This attention to detail may save you from a frustrating leak later on.
Lastly, once the flange is installed, consider applying a wax seal before placing the toilet. This added measure enhances the connection between the toilet and the flange.
Pay close attention to the flange's level. An uneven flange can result in instability and potential future plumbing issues. Don't rush; take your time to ensure everything is correct.
Testing the connection between a toilet flange and a cast iron pipe is crucial for ensuring stability and preventing leaks. Industry experts suggest that a significant percentage of plumbing issues arise from improper connections. According to a report by the American Society of Plumbing Engineers, nearly 25% of toilet leaks result from faulty flange installations. This highlights the importance of thorough testing after the installation process.
To test for leaks, first, turn on the water supply. After flushing the toilet several times, inspect the connection for any signs of moisture. If you notice water accumulation, recheck your fittings. In many cases, the flange requires adjustment or a better seal. A well-installed flange should exhibit no leaks under normal conditions, so pay close attention during this phase.
Tips: Ensure that your wax ring is properly seated. This simple step can significantly reduce the risk of leaks. Additionally, use a level to confirm that the toilet is stable and upright. An unstable toilet can cause excessive wear on connections over time, leading to potential failures. Testing may involve moving the toilet slightly, considering both the flange alignment and the pipe condition. Always approach these tasks with safety in mind, and be prepared for some trial and error.
: A toilet flange serves as a mounting point for the toilet and connects to the drainage system.
Cast iron pipes are durable but rigid, making installation challenging.
Missing screws can lead to improper alignment and leaks.
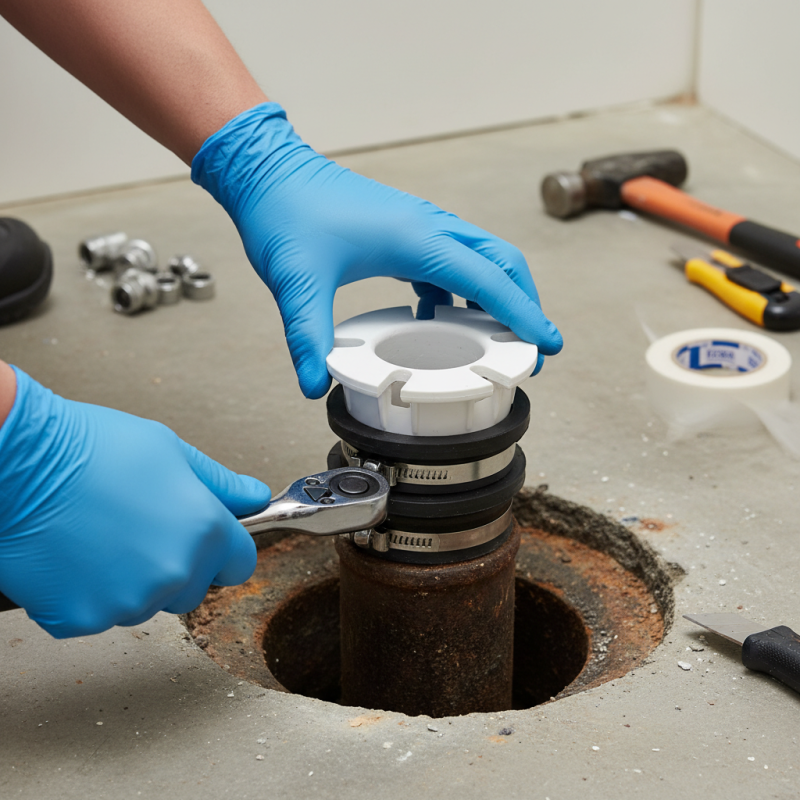
Make sure the cast iron pipe is free of rust and debris before installation.
You will need a wax ring, flange bolts, and a power drill for the installation.
Clear the area and clean the pipe’s end using a wire brush.
Turn on the water supply and inspect the connection for moisture accumulation.
Faulty flange installations account for nearly 25% of toilet leaks.
An unstable toilet can wear down connections, causing future failures.
Yes, sometimes the flange requires adjustment for proper seal and alignment.
When learning how to connect toilet flange to cast iron pipe, it’s essential to first understand the components involved. Toilet flanges serve as a crucial connection between the toilet and the drain pipe, while cast iron pipes are known for their durability. To start the installation, you'll need specific tools that will make the process easier and more efficient.
The step-by-step guide involves preparing the connection by cleaning both the flange and the pipe, followed by securely installing the toilet flange onto the cast iron pipe. After the installation is completed, testing for leaks and ensuring stability is critical to prevent future plumbing issues. This comprehensive approach ensures a reliable connection, allowing for proper toilet function and longevity.
EZ STEEL